Back to Content
Lightmapping
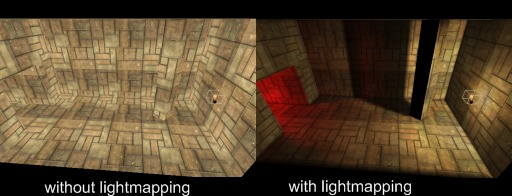
The CopperCube editor has a powerful global illumination lightmapper built in, which can make 3d scenes look more interesting, by calculating static light and shadows for fixed geometry:
This page gives a short overview on how to use the lightmapper. If you want dynamic shadows instead, take a look at the Realtime Shadows overview.
Lightmapping a scene
To use the lightmapper, simply create a scene in the editor with at least one mesh. Import some 3d mesh file into the editor or create your own with the 'add cube', 'add plane' and similar buttons:
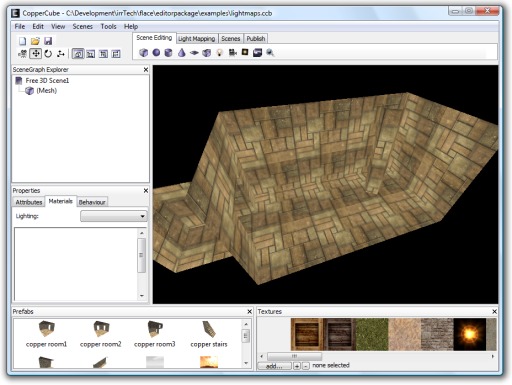 The scene to be lighted
Now, click the 'add point light' button on the 'scene editing' tab to add a point light. Alternatively, you could also right-click into the scene and select 'insert -> create a point light'. Move the light close to your mesh. Then, on the 'Light Mapping' tab, click 'Calculate!'. The scene may look now like this:
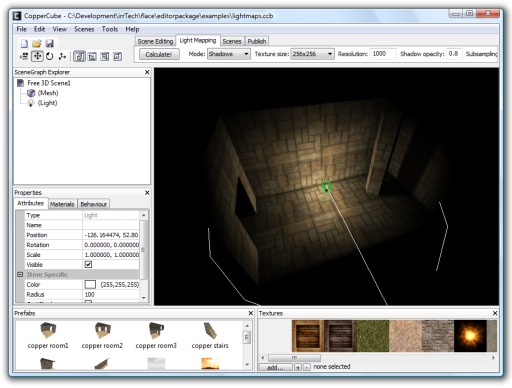 The same scene, lightmapped
If your scene is dark instead, your light might not be big enough or is hidden behind a wall or similar. Move the light a bit, and try to adjust its settings. When the light is selected, you can find some values to adjust on the 'attributes' tab in the property window: Try to increase the Radius of the light for example. And if you like, change the color of the light.
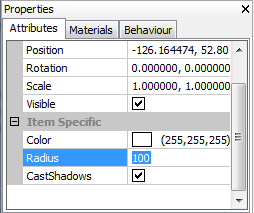 Properties of the light
You can also freely add more lights to the scene if you wish.
There are also several options of the lightmapper available which you might want to change:
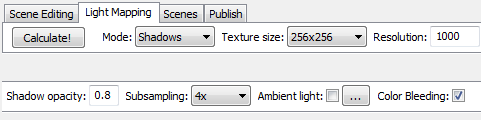 Lightmapping options
- Resolution: is the most important setting. The smaller this value is, the higher is the resolution and the more amount of memory is used for lightmap texture. If you want sharp shadows, use smaller values, but try to change this only with caution.
- Mode: The lightmapping mode. 'Shadows' is the default and gives good and fast results, but if you want to use global illumination, you can try this out here as well. If you only want to test out the rough color of your settings, your can turn to 'Diffuse' mode which doesn't calculate shadows but is very fast.
- Texture Size influences the size of the lightmap textures, but also the resolution.
- Shadow opacity: Influences the transpency of the shadows. Set it to 1.0 to make the shadows completely dark.
- Sub sampling: increases the precision of the calculation without inceasing the amount of used lightmap memory but slows down the calculation speed.
- Color bleeding: only in effect when using Global Illumination.
Lights and shadows created using this technique are static and do not move when an object or a light source moves. If you want to have dynamic shadows instead, use the realtime shadows technique instead.