Back to Content
3D Collision with JavaScript
This example shows how to test a collision between the mouse cursor and a 3d object in a Coppercube scene using JavaScript. This is only useful when using the Windows (.exe) or MacOS (.app) target of CopperCube. If you are looking for the WebGL version, take a look here.
.
To start, do the following:
- Start the CopperCube editor and create a new Free 3D scene. Use the scene as it is, usually, there should be a skybox and a cube named 'cubeMesh1' in that scene.
- Add a second cube with the 'Create a cube' button on the 'Scene editing' tab with he default values.
- Move the cubes a bit so that the scene looks a bit like this:
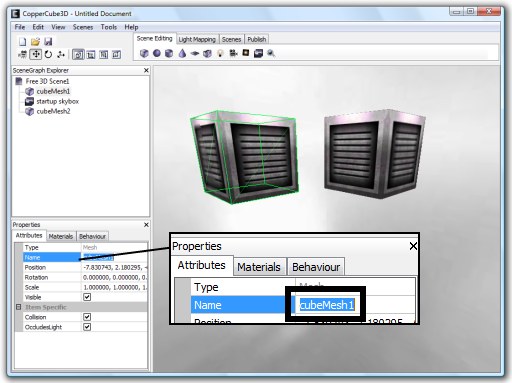 The scene for this example.
- Set the 'Name' property of the first Cube to 'cubeMesh1' and the Name of the second cube to 'cubeMesh2', as in the image above. Note: The names are case sensitive, so be sure to name them exactly like described.
- Create a new Camera using 'Edit -> Insert -> Create Camera' and select 'Simple Camera'. Move the camera around so that it looks at the both cubes.
- Save the scene as 'test.ccb'
- Publish it as Windows (.exe) [or Mac OS X (.app)] file, using either 'Tools -> Test as Windows Application' or 'File -> Publish -> Publish as Windows Application'. A file named test.exe should now be written out, where you saved the test.ccb file.
- Now create an empty text file where your saved the test.ccb file and name it 'test.js'. Edit this file with your favorite text editor (recommended: Notepad++, it
supports JavaScript syntax highlighting). When publishing your file now as Windows .exe, CopperCube will include this
script into the .exe file and use it as main script.
Use the following code:
// register for the drawing event
ccbRegisterOnFrameEvent("onFrameDrawing");


function onFrameDrawing()
{
	var mouseX = ccbGetMousePosX();
	var mouseY = ccbGetMousePosY();

	// test collision

	var cube1 = ccbGetSceneNodeFromName("cubeMesh1");
	var cube2 = ccbGetSceneNodeFromName("cubeMesh2");

	var endPoint3d = ccbGet3DPosFrom2DPos(mouseX, mouseY);
	var startPos3D = ccbGetSceneNodeProperty(ccbGetActiveCamera(), "Position");

	var cube1Hovered =
	 ccbDoesLineCollideWithBoundingBoxOfSceneNode(cube1, startPos3D.x, startPos3D.y, startPos3D.z,
	                                              endPoint3d.x, endPoint3d.y, endPoint3d.z);

	var cube2Hovered =
	 ccbDoesLineCollideWithBoundingBoxOfSceneNode(cube2, startPos3D.x, startPos3D.y, startPos3D.z,
	                                              endPoint3d.x, endPoint3d.y, endPoint3d.z);

	ccbSetSceneNodeMaterialProperty(cube1, 0, "Wireframe", cube1Hovered);
	ccbSetSceneNodeMaterialProperty(cube2, 0, "Wireframe", cube2Hovered);
}
When you now start the application again (Tools -> 'Test As Windows Application (.exe)'), this will turn on the wireframe mode for the cube where the mouse pointer is over. The result should look like this:
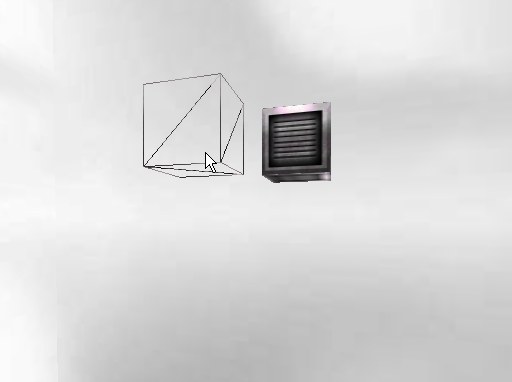 The 3d object where the mouse cursor is over will be drawn in wireframe mode.
This example works by accessing the JavaScript api. You can manipulate all aspects of the 3D scene with this API: textures, materials, positions, objects etc. For a full reference to all functions, see the JavaScript Scripting reference.