Ambiera ForumDiscussions, Help and Support. |
|
| [ 1 2 ] Page 2 of 2 |
|
|||||
|
Woah, this actually works! However, it seems that it doesn't make a lightmap for this object, because it just takes less than a second to complete (settings doesn't affect it), and the result is same for different lightmapping types (diffuse, shadows, global occlusion). Still, it does impressive job (no more of those lines, yay)! Thanks, VP, very cool. |
||||
|
@dekon Here's a couple more resources for making normals: https://cpetry.github.io/NormalM... [urlhttps://magazine.renderosity.com/article/5579/materialize-a-free-texture-creation-tool[/url] The first link is similar to the one VP shared, but the second one is a free program that can also make other types of maps. I have been using dynamic lighting in my current project due to needing a flashlight, but it's good to know for future projects that static lighting needs a normal map. Thanks, VP. |
||||
|
https://magazine.renderosity.com... Fixed link. |
||||
|
I tried calculating a lightmap for object, and so, it looks like you can't actually do a lightmap for object with normal map (I've applied normal map in CopperCube, in materials tab). I also checked CopperCube documentation about normal mapping, and there (in example) lighting mode was set on "Dynamic". And in irrEdit properties there you can only choose between normal map or light map, so, that's why you (and I, heh) can't do a light map for an object that has a normal map. So, does this mean that I need to do something different? Edit: I tried applying a normal maps in Blender, but it doesn't work at all. CopperCube doesn't open those normals. Also, I suppose that there is no lines with normals not because they does some magic. In fact, lines doesn't appear when object use dynamic lighting, so, that's the reason why it improves the situation...
|
||||
|
@dekon Yeah... I just tested and that didn't work at all. |
||||
|
Oh, that's sad. Sorry about that :( I tested with a basic scene (a cube and a single static light with no dynamic lighting)... I added the normal map in the cube's materials, then set lighting to "static". I then hit calculate light map - it calculated very quickly (less than a second). It seems to work for me. I'm probably misunderstanding what you mean by "light mapping" because I'm fairly new to developing and have a type of dYsLeXiA, lol :s I light all my game (except animated models) using normal maps to get rid of the low-poly surface lines and jagged edges and adding better shadow detail to the textures. It seems that my game now looks a lot better (and runs a lot faster) with statically-lit normal-maps, rather than dynamically-lit real-time shadows. I was so impressed by this technique in Coppercube that I bought MindTex2 on Steam just for creating Normal Maps for all my textures. I just use256x256 normal maps (about 15kb each), one for each texture. I remember someone also mentioned on the forum that they use static lighting with "parallax" maps (in irrlicht material settings) - so that may be something else you can try to see if it helps with your specific issue. *Note, static lighting looks different (darker) whenever a normal map is added to the material because (I think) it's affecting how much light bounces off the surface (ie, it's adding more shadow to the material's surface). To compensate for this, I just increase the scene's ambient light slightly. |
||||
|
@dekon So far anisotropic filtering on all materials of the model is the best solution for those black lines. I have tested it in full screen without noticing any defects. I believe those black lines are caused by the uv maps being packed too tight together. There is an option in blender for smart uv project that allows you to set a margin of space around the individual uvs. It may be worth trying that out and seeing if it helps. I may do so later. @VP The problem with doing it your way is that the lights aren't actually being baked into a material. If you remove the light source, the model goes back to being dark--which means it's acting dynamically. With static light you can delete the light or move it, and the light is still on the model. At least that is how I understand it as this point. I have seen your game and it looks great, so I may need to try some experiments with your method. Thanks for your insights. |
||||
|
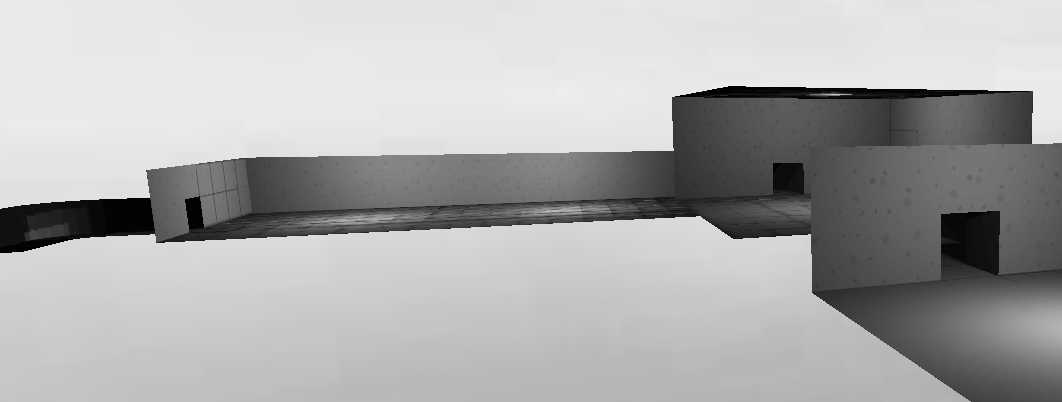
Well... For some reason, none of these help me. There is anisotropic filtering enabled, and model has margin This is UV of my model: I don't know why this doesn't help, but... Well, while writing this, I found that it fixes if you turn off the second bilinear filter. I just... I GENUINELY DON'T KNOW why does the thing that turned on BY DEFAULT just breaks the lighting! Seriously, here's the result of room with NO BilinearFilter2: And here is the image with this filter: It just... It's the ONLY bilinear filter that does this (I've checked all of them, and this is the only one that makes those lines)! Well... At least - problem is solved... For now. Edit: I also found that you need to disable ALL the filters with number 2, so, the lines will be gone
|
||||
|
@dekon The lines appear with the arched roof option even if anisotropic filtering is turned on and bilinear is turned off. Then I unchecked just anisotropic 2 filter and it went away. What a weird problem. Well, hopefully that solves this issue. |
||||
|
I have some bad news: all the second filters (bilinear, trilinear and anisotropic) affects smoothing of shadows, so, without them the light will look chunky (it will be like a pixel art). So, it doesn't matter for people who want to create retro-ish games, where pixelated light will only look better. But, for example, in my case, it isn't what I want. So, there's two ways: 1) Use very low resolution (about 300); 2) Tolerate this... yeah. The first on will make a LOT of light maps. Also, while you wait for it to calculate (at least for a big maps), you will probably start a family, make kids and, possibly, die from being incredibly old. But at least you'll have pretty decent lighting on level. And about the second one... Should I even say something? So, if you'll find something useful about lightmapping, please, write it here, just to make someone's life a bit easier, heh. Unfortunately, I can't leave any pictures here because of password for Postimages. The thing about it is that I forgor. |
||||
| [ 1 2 ] Page 2 of 2 |
|
|


)